

Advertisements:
Hand Applique
- Cut your background square for an appliqué block at least 1 1/2 to 2 inches larger than the finished size. The larger square will give you the room to square up your block if needed. It the block is intricate it can actually shrink as you add all the appliqué pieces.
-
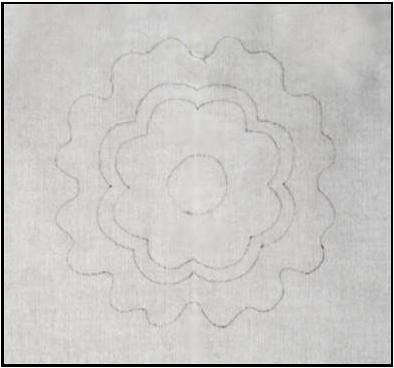
You’ll want to center your printed pattern under your background fabric and trace the design on the right side of your fabric. I usually use a .01 pigma marking pen for this and you’ll want to keep your lines 1/8†inside the actual printed pattern. Doing this will eliminate the possibility of having those lines show on your finished block.
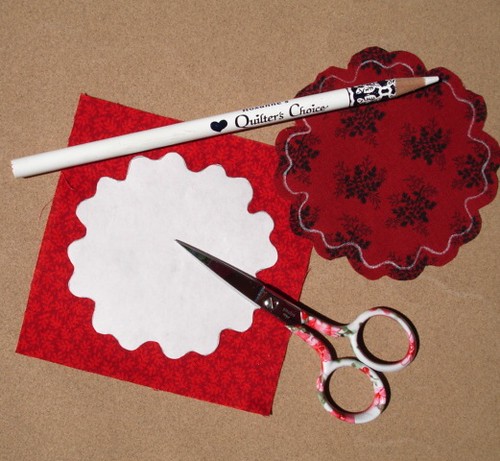
- I make templates for my appliqué by tracing the individual pieces of the dull side of a piece of freezer paper. Cut out the shape on the drawn line. Using a hot dry iron, the waxy side will adhere to fabric and you’ll have a template easily held in place to trace around.
- I like to mark around the edge of the template so I can see my stitching line. I lay the piece on a sandpaper board (or your cutting mat) so keep it from slipping and mark around the outside edge of the template. On light color fabric I use my pigma marking pen and on dark fabrics, a silver or white pencil works well.
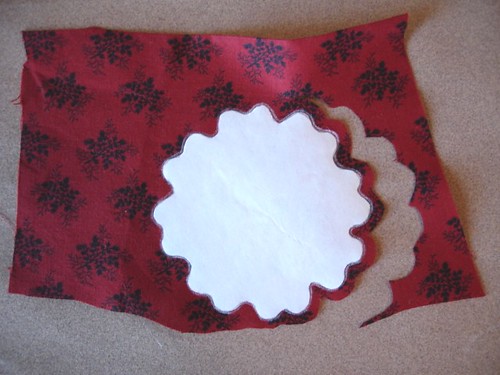
- Cut out around the template adding a scant 1/4†seam allowance as you cut. You can peel off your freezer paper template at this point and reuse it if you want. The templates can be use several times.
- Clip all inside curves just to the marked line. There is no need to clip the outer curves.
- Align the shape on your background block, centering it over it’s marked section. Pin in place. I like the Clover, white head appliqué pins. They’re about 3/4†long and easy to maneuver but will do a good job of staying clear of your thread as you sew.
- The following stitching instruction are for Needle-Turn appliqué. I like to appliqué with either 100% cotton 60 wt. thread that matches your appliqué piece or #100 silk thread of which you only need a few neutral colors because it hides itself so well in cotton fabrics.
- Thread your needle (Milliners #10 is my favorite) and knot the end. Bring the needle up between the edge of the appliqué piece and the background on the marked line. Start sewing on a smooth edge of the appliqué shape and not in a clipped inside curve.
-
- Use the point of your needle to turn the seam allowance under about an 1/2 inch ahead of where you brought your needle up. Insert the point of the needle back through the background fabric right next to where the stitch came up on the appliqué piece.
- Continue to turn the seam allowance under and take stitches in this manner, coming up near the fold on the appliqué piece and going down through the background fabric. Try to keep your stitches about 1/8†apart. You’ll need to take tinier stitches when at an inside curve.
- End your thread by knotting on the wrong side of the background fabric.
- I went on a thread buying spree and bought every color of 60 wt. Mettler cotton thread that was available. In the bag they looked like a jumbled mess. My solution, make a trip to the toy deparment at your local Walmart or Target and you'll find a two-sided carrying case for Hot Wheels cars. It has great dividers and measures about 10" x 13" x 3 1/4". I organized my thread by color and now it's easy to find. There's a handle for taking to classes or retreats too. I've heard there are cases like this for fishing tackle too.

- If your silk thread for hand applique keeps sliding out of the needle, tie it to the eye with two quick little knots. It won't make a difference when going through the fabric and will save you lots of frustration. Just clip the thread off at the eye when it's time to thread again.


Tips
-


Follow Me!