

Hand Quilting
I'm going to share with you some of my favorite tools to use and what techniques work for me. Try them to see if you like them but remember, hand quilting is a very personal technique. What works for me might not work for you and there is no right or wrong way to quilt. I was taught by an Amish lady, Oma Schlabach. Sadly for me, she didn't use a thimble so I didn't learn with one. I wish I had! She taught me to quilt by pushing the needle with the nail on either my thumb or middle finger depending on the direction I was quilting. I used to punch holes right through my nails but have found relief with the application of acrylic nails. I really don't recommend this but I own nearly every thimble known to man quilter or woman quilter and haven't found one that does the trick.
My father introduced the quilting world to the raised edge thimble in the 1980s and it's changed the way many quilter's quilt. The design has been copied, modified and still continues to evolve. The thimbles are available in a wide range of sizes and styles. They have been the answer for thousands of quilter's. If you're just starting out, buy one and learn WITH a thimble!

Batting & Backing
I love the look cotton batting give my quilts, especially after the quilts are washed. I have two favorites that I use, Hobbs Heirloom Cotton and Quilter's Dream Cotton.


-
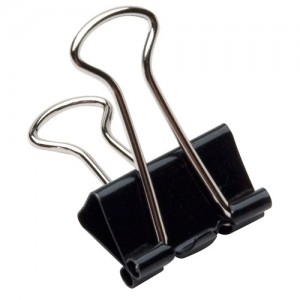
Place your quilt backing, right side down, on a large flat surface. I usually set up a 6 foot folding table that I have just for basting. Tape or secure with jumbo binding clips, the backing to the surface keeping it slightly taught. The binding clips are about 2" wide and available at most office supply stores. If you don't have room to store a table just for basting, many quilt shops will let you use their classroom tables for basting so be sure to call and ask. Another option is to use your church's fellowship hall.
- Center your batting and quilt top, right side up, on the backing.
-

You can thread baste the quilt with long stitches, through all three layers by stitching a horizontal and vertical line through the center of your quilt beginning in the center and stitching toward the outside edge. Next, you'll want to baste diagonally from corner to corner in both directions. If you are working on a large quilt, you'll need to add additional lines of basting so that you've covered the quilt with basting rows no more than 4" apart.
OR
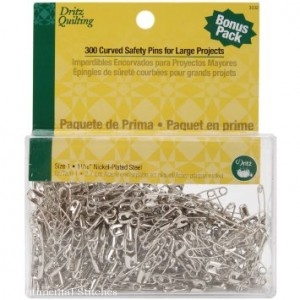
You can pin-baste your quilt in the same pattern using #1, rust-proof pins. Be sure your pins are rust-proof. They'll be labeled that way on the package. If they aren't, you could end up with rust spots on your quilt in quite a short time especially if you live in a humid climate.


The Stitch!
-
The actual quilting stitch is really very simple.
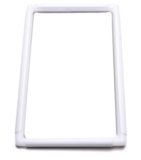
- You have quite a few choices in the type of hoop or frame to use. There are 14" round wood hoops, square and rectangular PVC hoops and half circle wood hoops. My favorite hoops for quilting are the 17" x 17" and 11" x 17" Q-Snap PVC frames. I like that I have square edge on my hoop to match the square edges on my blocks and border.
- If you're quilting in a hoop, one important thing to remember is to always start the quilting in the center of the quilt and work outwards in a sunburst effect just like you did your basting. Quilting like this will help keep wrinkles from sneaking their way in the back of your quilt. It really helps keep the fabrics even all around your quilt.
-
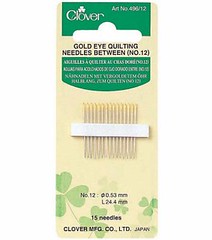
I like to quilt with a quilting needle which is very small. I use a size 12. If you are just starting out, I'd try a size 9 and work your way down in size. With quilting needles, the higher the number, the smaller the needle. They range in size from 7-12.
-
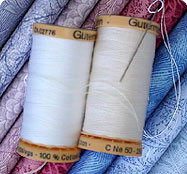
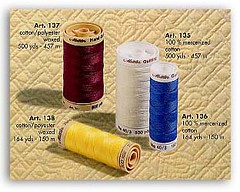
Unless you're using specialty thread for a specific look you'll want to use quilting thread. It is a more heavy in weight than sewing thread, usually has a waxed finish and is stronger than ordinary thread. I have quilted with several brands of thread and had good results with Mettler, Gutterman and YLI.

-
The "Quilt Police Rules" suggest you cut a length of thread about 18" long. I like to go as far as I can on a threading of the needles so my cuts are about 27" long.
- Thread the needle and make a simple small knot at the end. There is a knot called "The Quilter's Knot". Here's a pretty good description and illustration. Hand Quilting Sharon Schamber.
- Slip the needle through the quilt top and batting layers about 1" from where you want to begin quilting. You don't want to pull the knot through to the back of the quilt at this point. You want to keep the needle between the quilt top and backing.
-
Pull the thread through until the knot is resting on the quilt top. Give a gentle tug and the knot should pull through the top into the batting and it will rest between the layers. Make a very small back stitch at the first point of the quilting line. This is to secure the knot so it won't pull through.
- The quilting stitch is actually a small running stitch. The needle is a usually held in the thimble which is on the third finger and rocked up and down, in and out of the quilt.
- The needle will almost lie flat against the quilt as it is rocked down and become almost vertical when rocked up again. Your thumb of the hand holding the needle is used to gently press down on the quilt just ahead of where your needle is going.
- When quilting, keep one of the first three fingers of your other hand under the quilt to feel the needle as it comes through on it's downward motion. My finger usually gets pretty sore and callused. When I'm on a mission to finish a quilt, I've painted "New Skin" on my finger so I can continue to quilt relatively pain free. Some people will wear a flexible leather thimble on the hand that is under the quilt. It is important that the needle makes it through to the back of the quilt, as it is the quilting that holds all the layers together. This may take some practice and in the beginning your goal should be to get even stitches. Small stitches will come with practice.
- I can get about 4-5 stitches on the needle at one time, but when I first learned I only did one or two at a time.
- When you get to the end of the row of quilting, you may be able to skoot through the layers to the next line without having to knot and cut your thread. If the next row is no more than 1" away, skoot the needle through between the quilt top and the batting and bring it up right where your next line begins.
-
If you need to knot and cut your thread, bring the needle to the top and make a loop with the thread, pass the needle through the loop and draw the knot down so that it is about 1/2" from the stitching.
- Take a tiny backstitch and pull the needle and thread through the quilt top and into the batting, giving a geltle tug to get the knot through the fabric. Bring the needle back up about 1" from where you went in the quilt top and cut your thread close to the quilt top.


Follow Me!