

I could hardly contain myself waiting to write this post. There's so much I want to share with you about the quilt and don't know where to begin. I love seeing all the blocks in the quilt's Facebook group. They're just fantastic and a wonderful variety of colors and styles. I'm happy to see everyone making the quilt and putting their own twist on it. I'm also very honored so have so many talented quilters stitching with me. If you haven't joined yet I really hope you'll think about it. The inspiration and tip sharing is fantastic.
 The winner of the February Anniversary prize is:Leanne. Congratulations!! We've aleady made contact with each other and I'll be sending her gift out this week.
 Thank you to everyone who commented, sent me information and has been trying to locate Eliza De Clarke who made this pretty block. I haven't definitely identified her yet but I now have some great clues to follow. I'll have to leave that for a month when there isn't another name to research and fill you in later. To be honest, I think I've overloaded my brain with information. There was more than one Laura Griffiths in New York city area during the same time period and trying to keep all their records separate is a challenge.

184 East 64th St
I have a copy of Laura's death certificate. She died on May 16, 1891 at the age of 50 which is 10 years older than first thought. The cause of death is listed as chronic endartilir mitral stenosis with a contributing cause of pleuritic effusion. How's that for a mouthful of medical jargon? I know there are at least two ladies in the Facebook group who have excellent medical backgrounds and can possibly interpret this better than I can but it sounds like Laura had trouble with her heart. Chronic endartilir mitral stenosis is a narrowing of the mitral valve in the heart between the two left chambers that bring the blood to and from the lungs. The narrowing can be caused by Rheumatic Fever which can follow an infection like strep throat that isn't treated with antibiotics. Symptoms don't appear for 10-20 years after an episode of Rheumatic Fever. The damage usually becomes apparent between 20 and 50 years of age. Pleuritic effusion is an abnormal amount of fluid around the lungs. It can be caused by congestive heart failure so it's very possible Laura had Rheumatic Fever as a child during the 1800s and it's damage to her heart is what caused her early death. She had been a widow for 3 years at the time of her death and moved from her retirement home in New Jersey back to New York several months before her death. At the time of her death her address was 184 East 64th Street. The address is part of the Upper East Side Historic District of beautiful homes. Easly in her marriage she and Alfred lived on Great Jones Street in the Village of New York City. In the mid 1800’s, Great Jones Street was one of the most prestigious addresses in Manhattan. The wealthy eventually moved uptown as did Laura and Alfred to 54 East 69th Street, also part of the historic district. They later retired to their summer house in Hackensack, NJ.
I've found a wonderful story about how she became engaged to Alfred. There's so much to get into today's post I'll have to save that for another day and apologize for being such a big tease. Trust me, it's worth waiting for.
 Have you ever seen this quilt? I came across a picture of it online by accident and nearly fell off my chair. It's so much like Laura's quilt that I can hardly believe it. The quilt appeared in the July 1938 issue of The American Home magazine as part of the article, Old Quilts Tell a Story by Florence Peto. How cool is that? The caption for the photograph reads, "The Housman Family of Staten Island, whose Dutch ancestors settled there in 1675, inherited this merry quilt... Major colors are red, green and orange". Florence describes the quilt in great detail in the article but admits little was known about it in 1938. She goes on to say, "according to the The 1938 owner of the quilt, she inherited it from an aunt whom she had seldom seen and she knows only that it was made in the Housman family which had Dutch ancestry; historical records show them to have lived on Staten Island as early as 1675. It is believed that some young son of the Housmans emigrated to Pennsylvania where he married a girl born and bred to German traditions. At her passing, the quilt went to the Staten Island branch of the family".
Had someone in this family seen Laura's quilt? It was made two years before the Housman quilt. Are the two families somehow related? They both have deep roots the New York area and you sure can't deny the resemblance between the two quilts. If you want to read the entire article on the Housman quilt you can find it HERE.

When I saw this quilt had a border on it I couldn't resist creating something for our 1857 Album Quilt. I stayed with the same style border but added a little flourish to the motif. I had to order more background fabric for my quilt but am using a solid so I think it'll be okay.

I designed the border to be constructed block by block similar to the way some of the 1930s Wurzburg kit quilts were made. The border pattern is available to download on the 1857 Album Quilt page and I'll keep it up there as long as we're working on the quilt in case you're not sure if you want to tackle a border or not.

Block 8
 This block will be a bit of a challenge with it's small pieces. Take your time, select fabrics that turn easy and aren't too stiff from sizing or starch and you'll be fine.

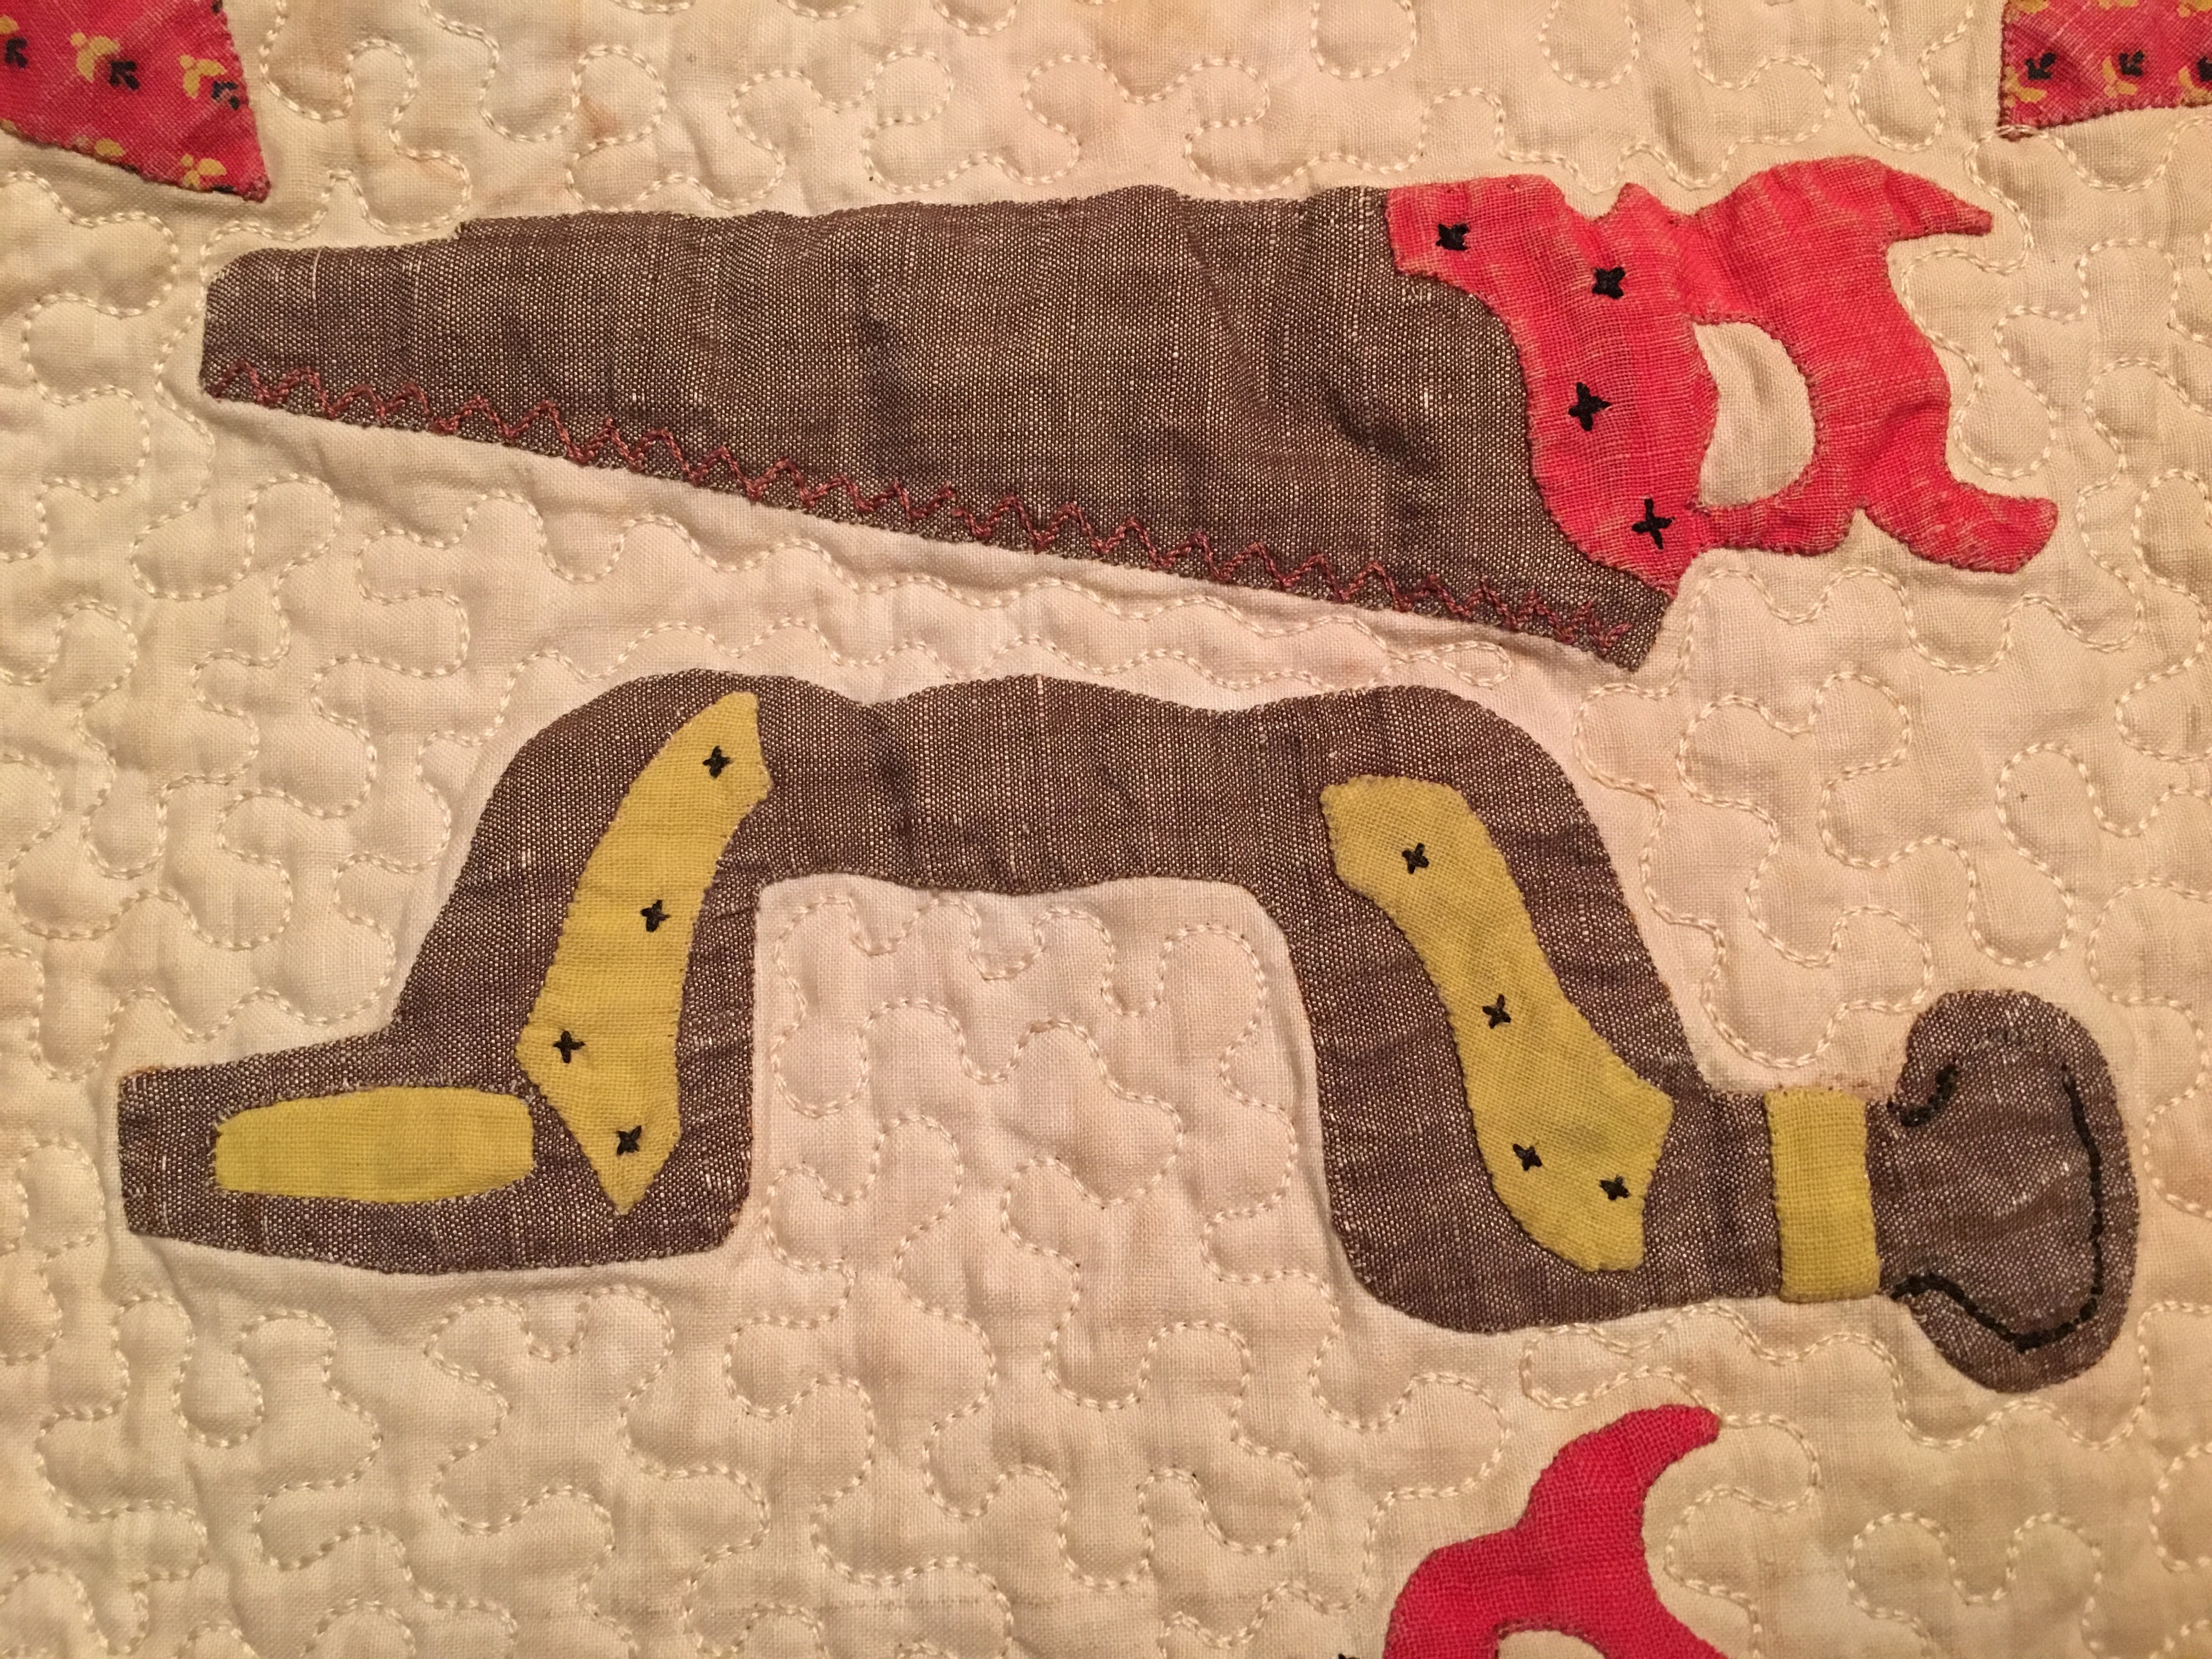
I love the little embroidered teeth on the saw. I'd use two strands of floss to stitch these. I think you could use two strands for the "x" stitches on the auger drill too. You can click on the picture to see the jumbo version. The zigzag is outline stitched across the bottom edge of the saw.
 The teeth on the adjustment screw for the plane might be better stitched using one strand of floss.
The block was made by H. Ackerman. I didn't get very far in researching this name. It's pretty difficult when you only have the initial of the first name and there are blocks representing both men and women in the quilt.

Block 9
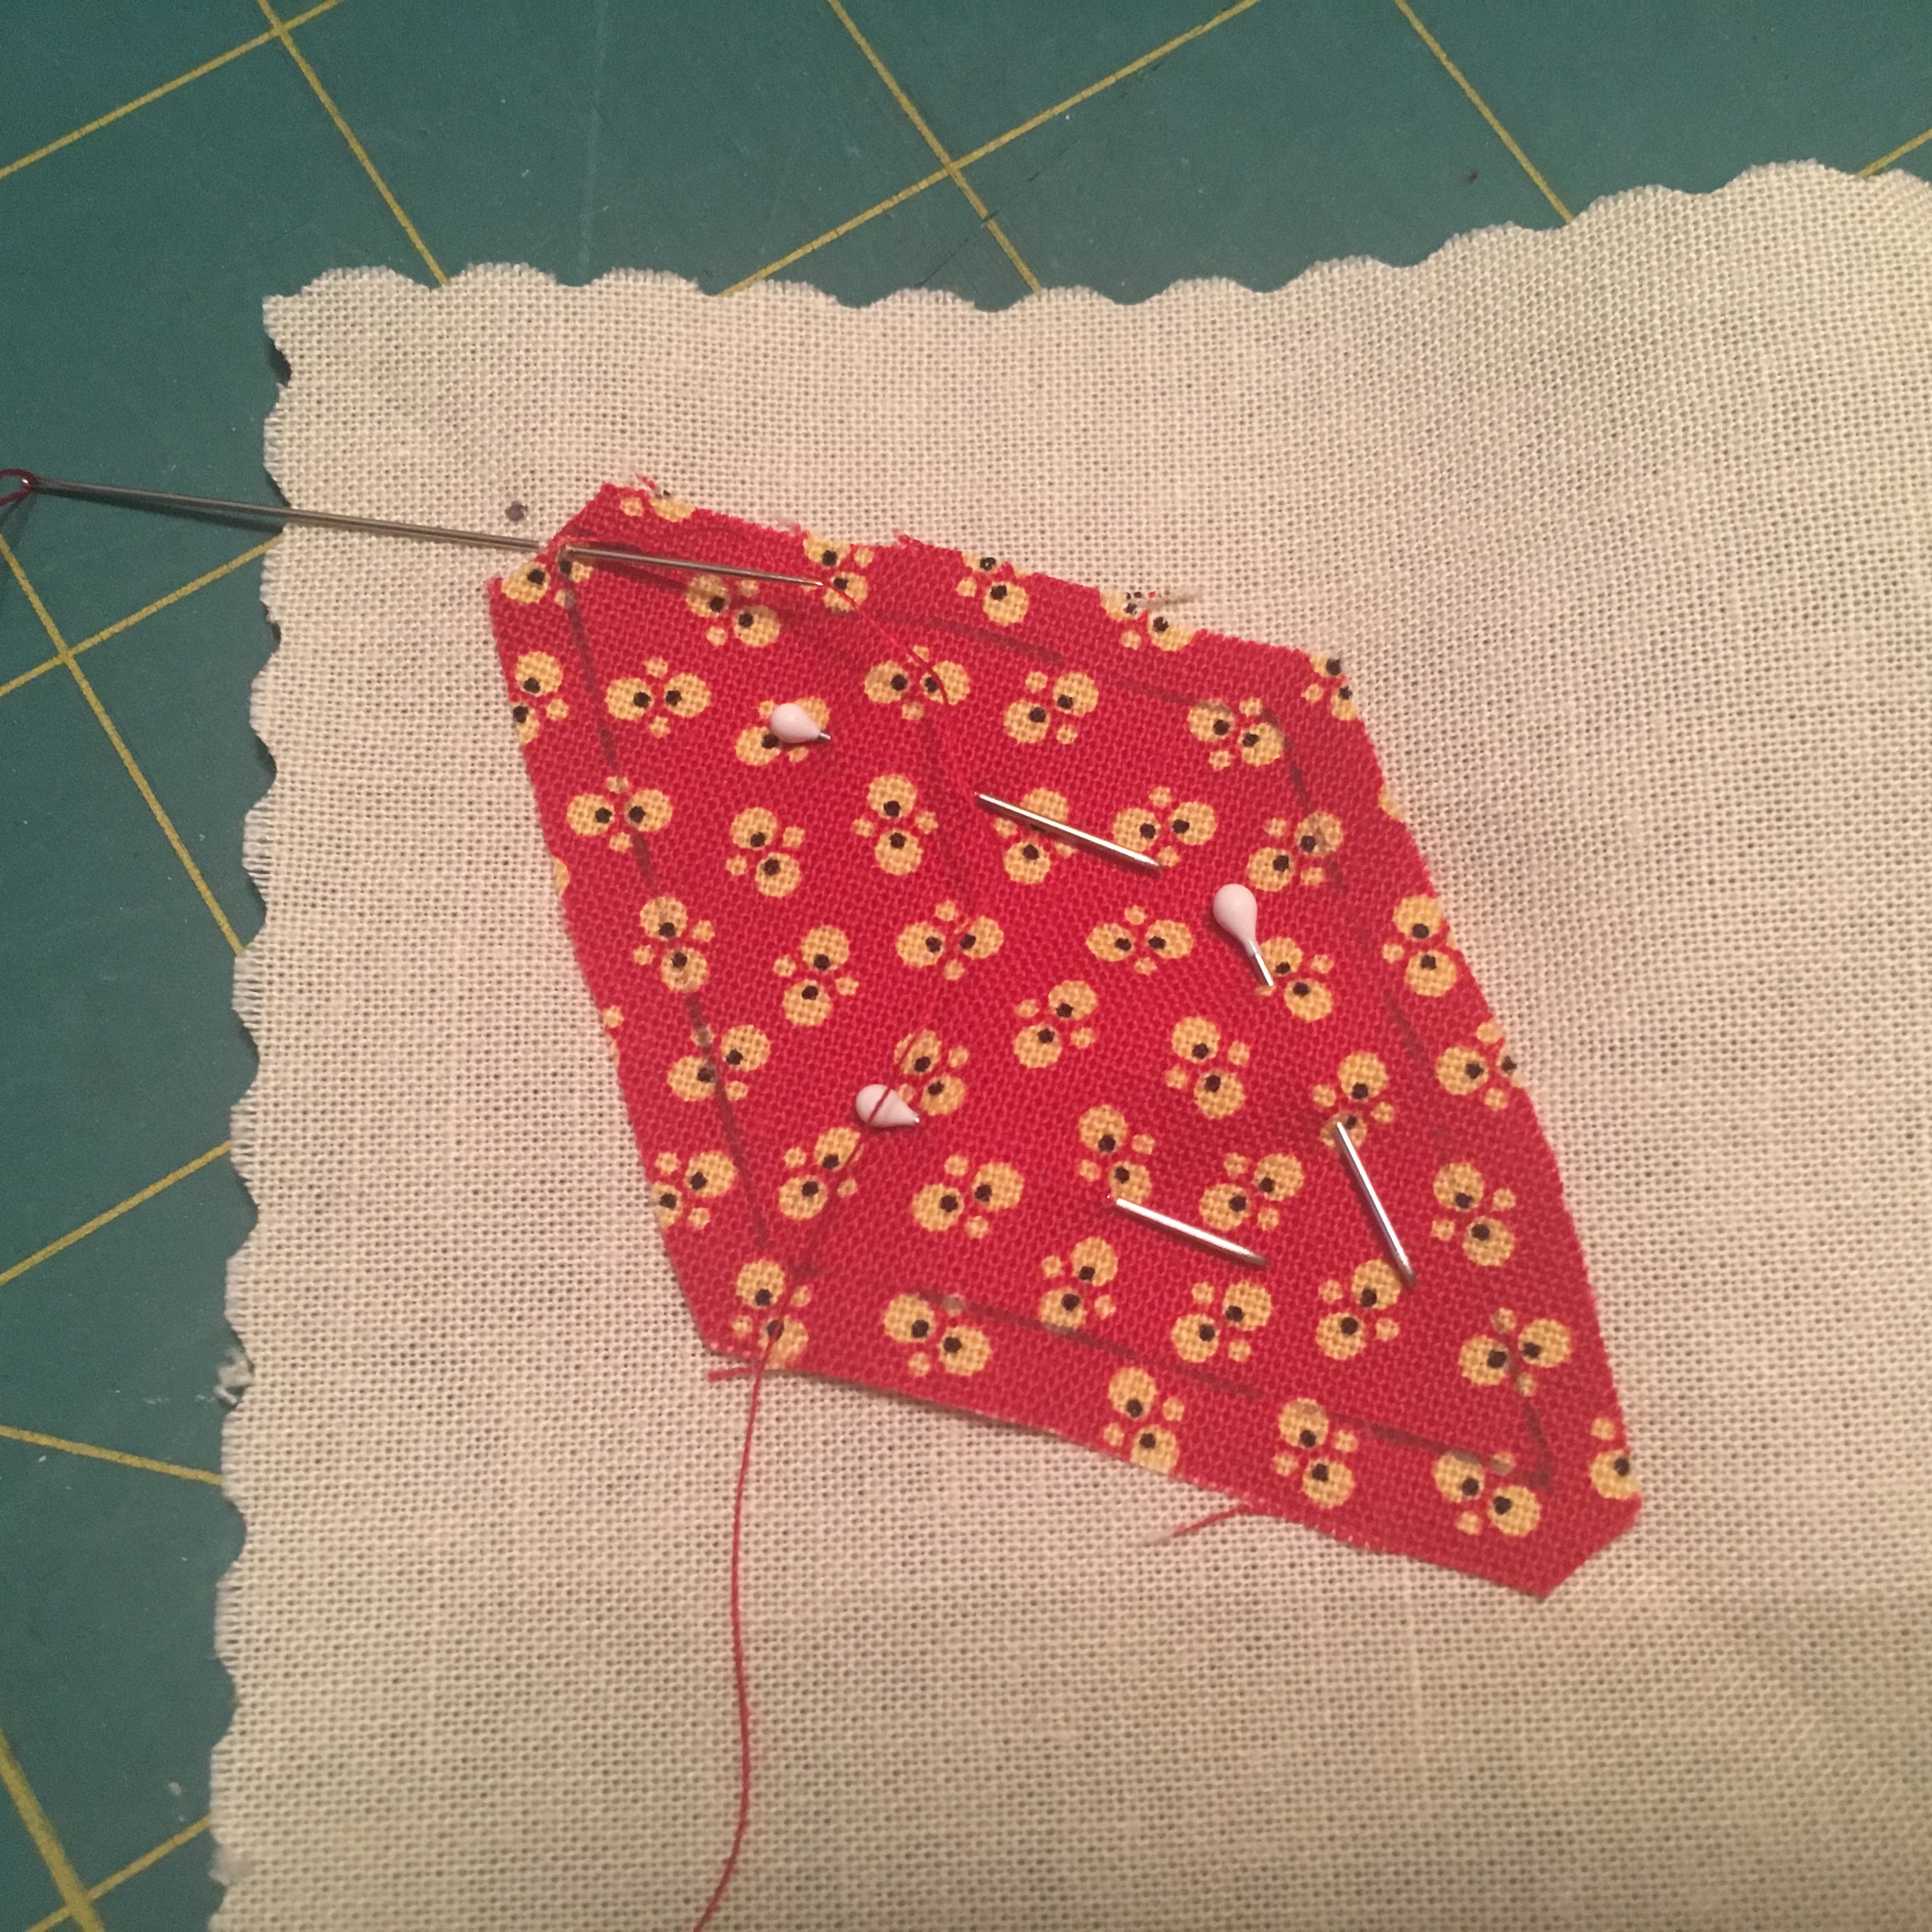
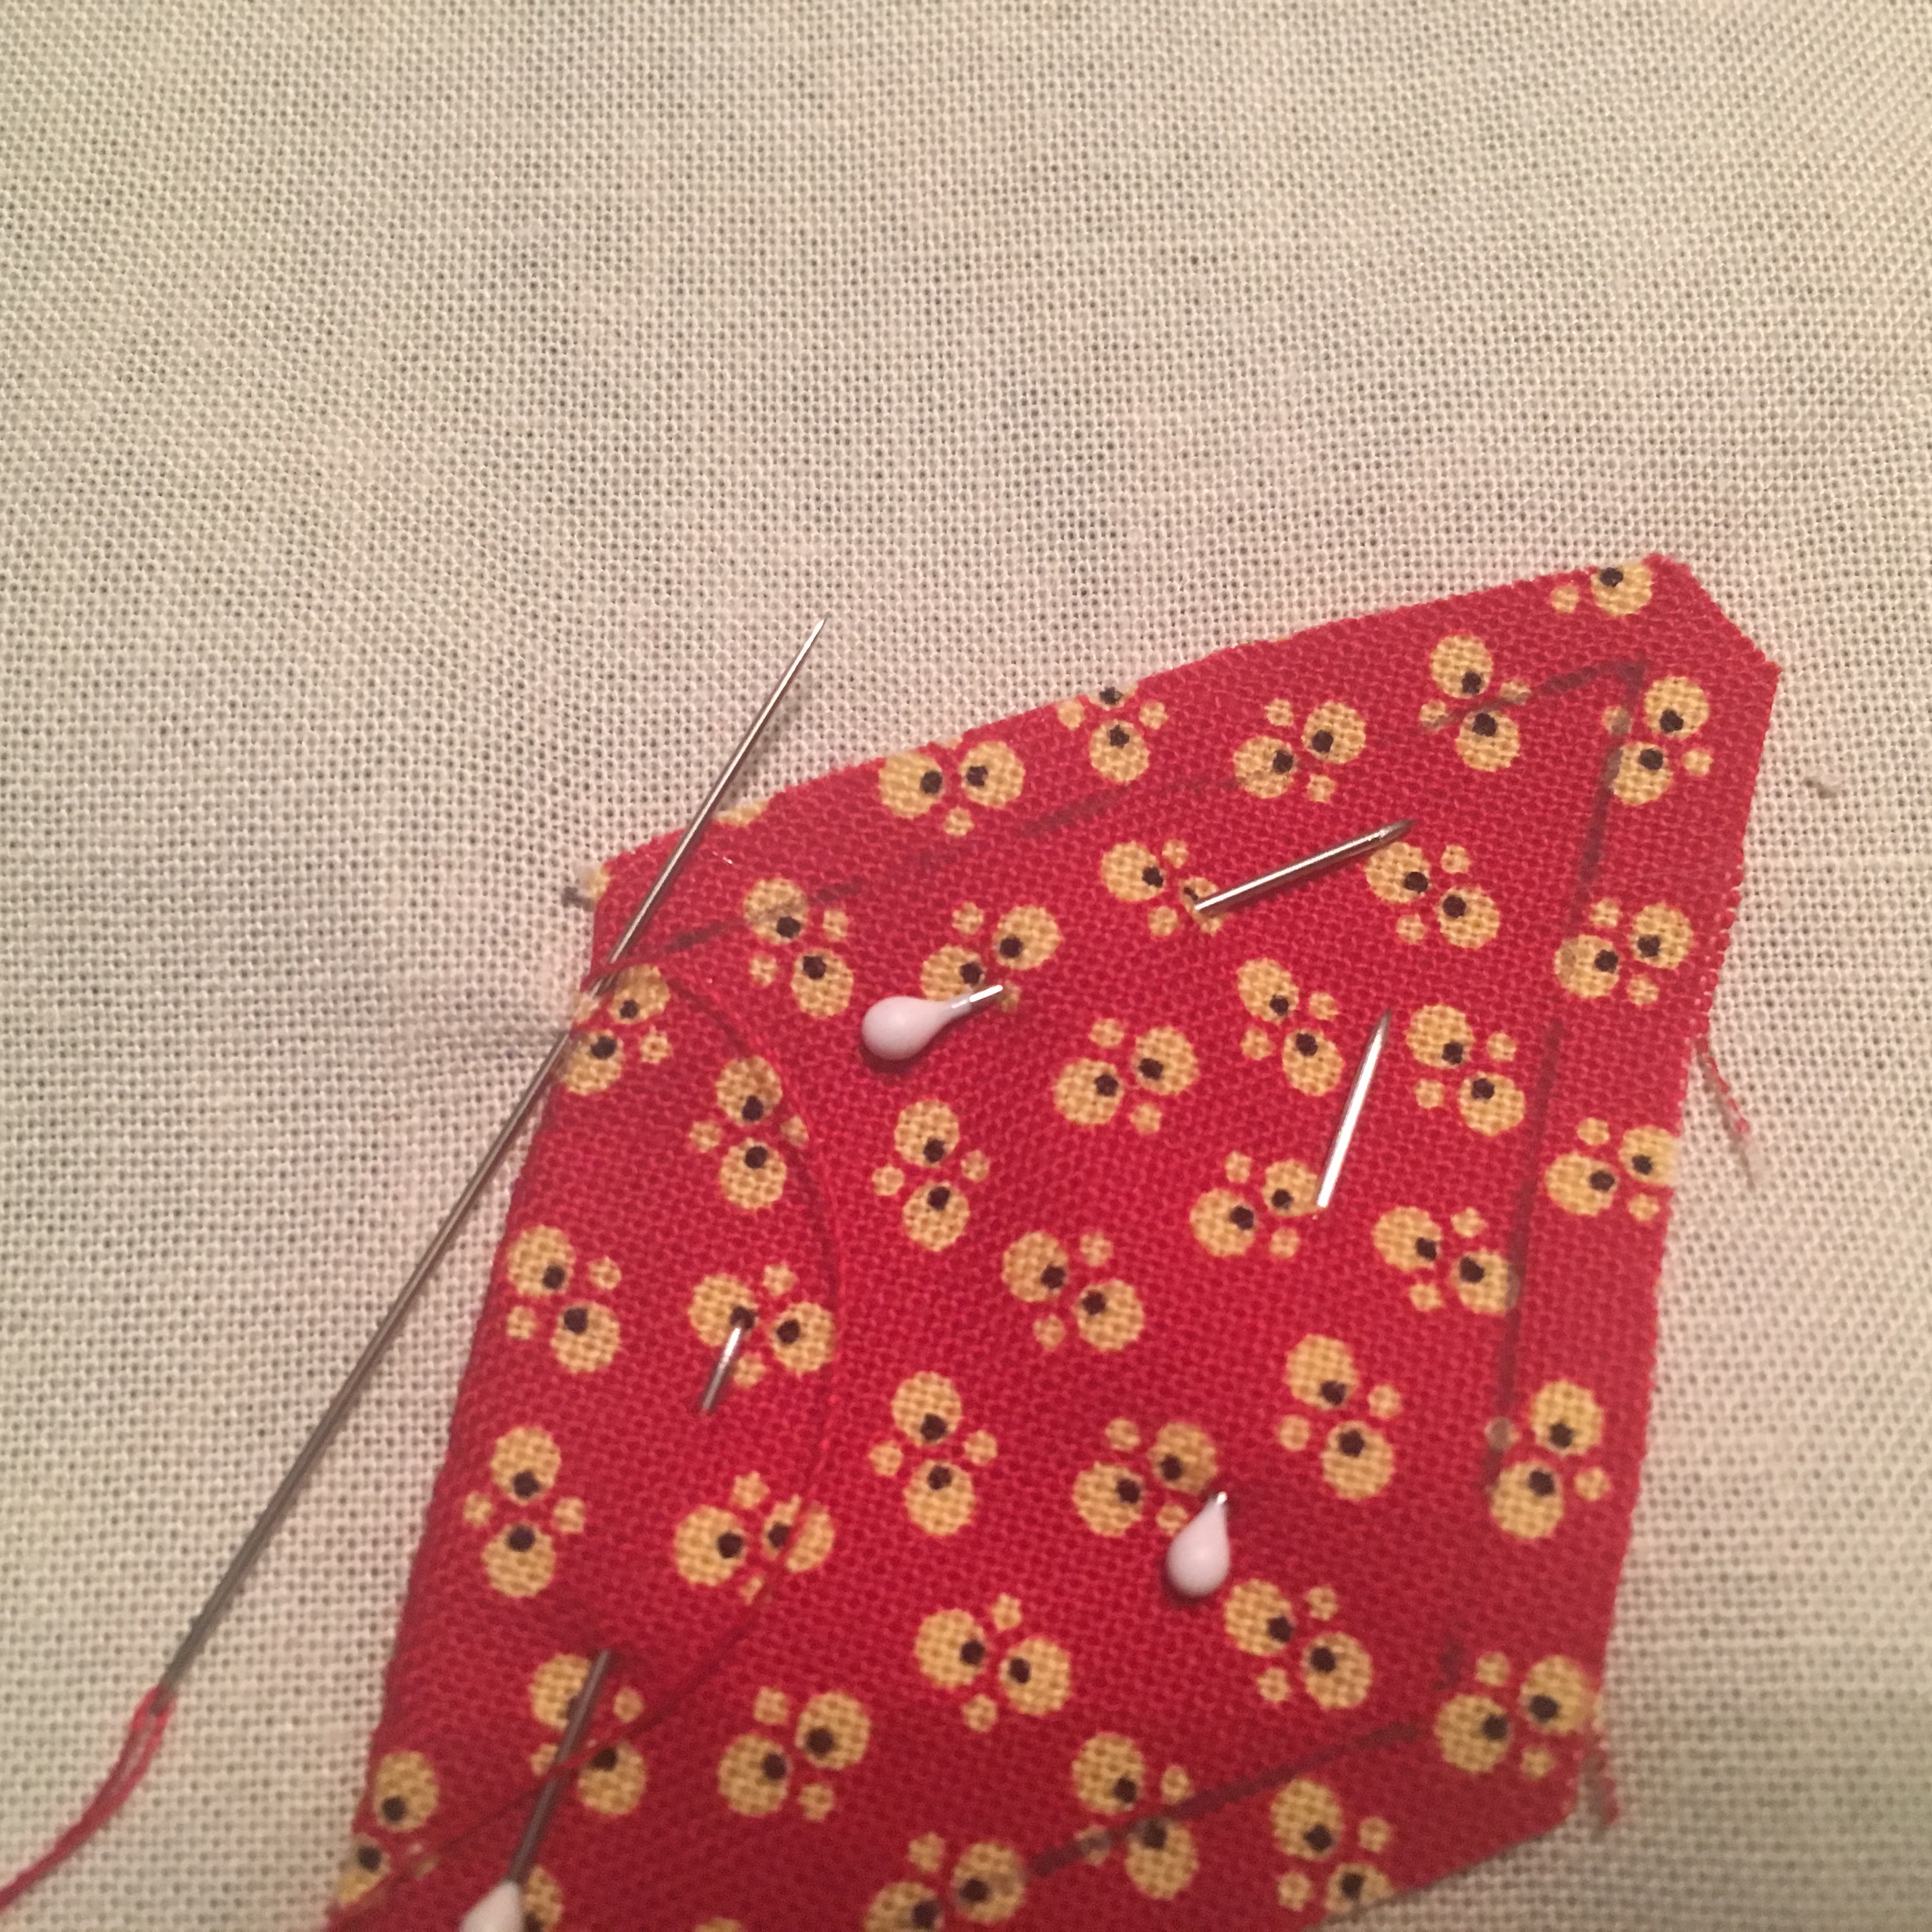
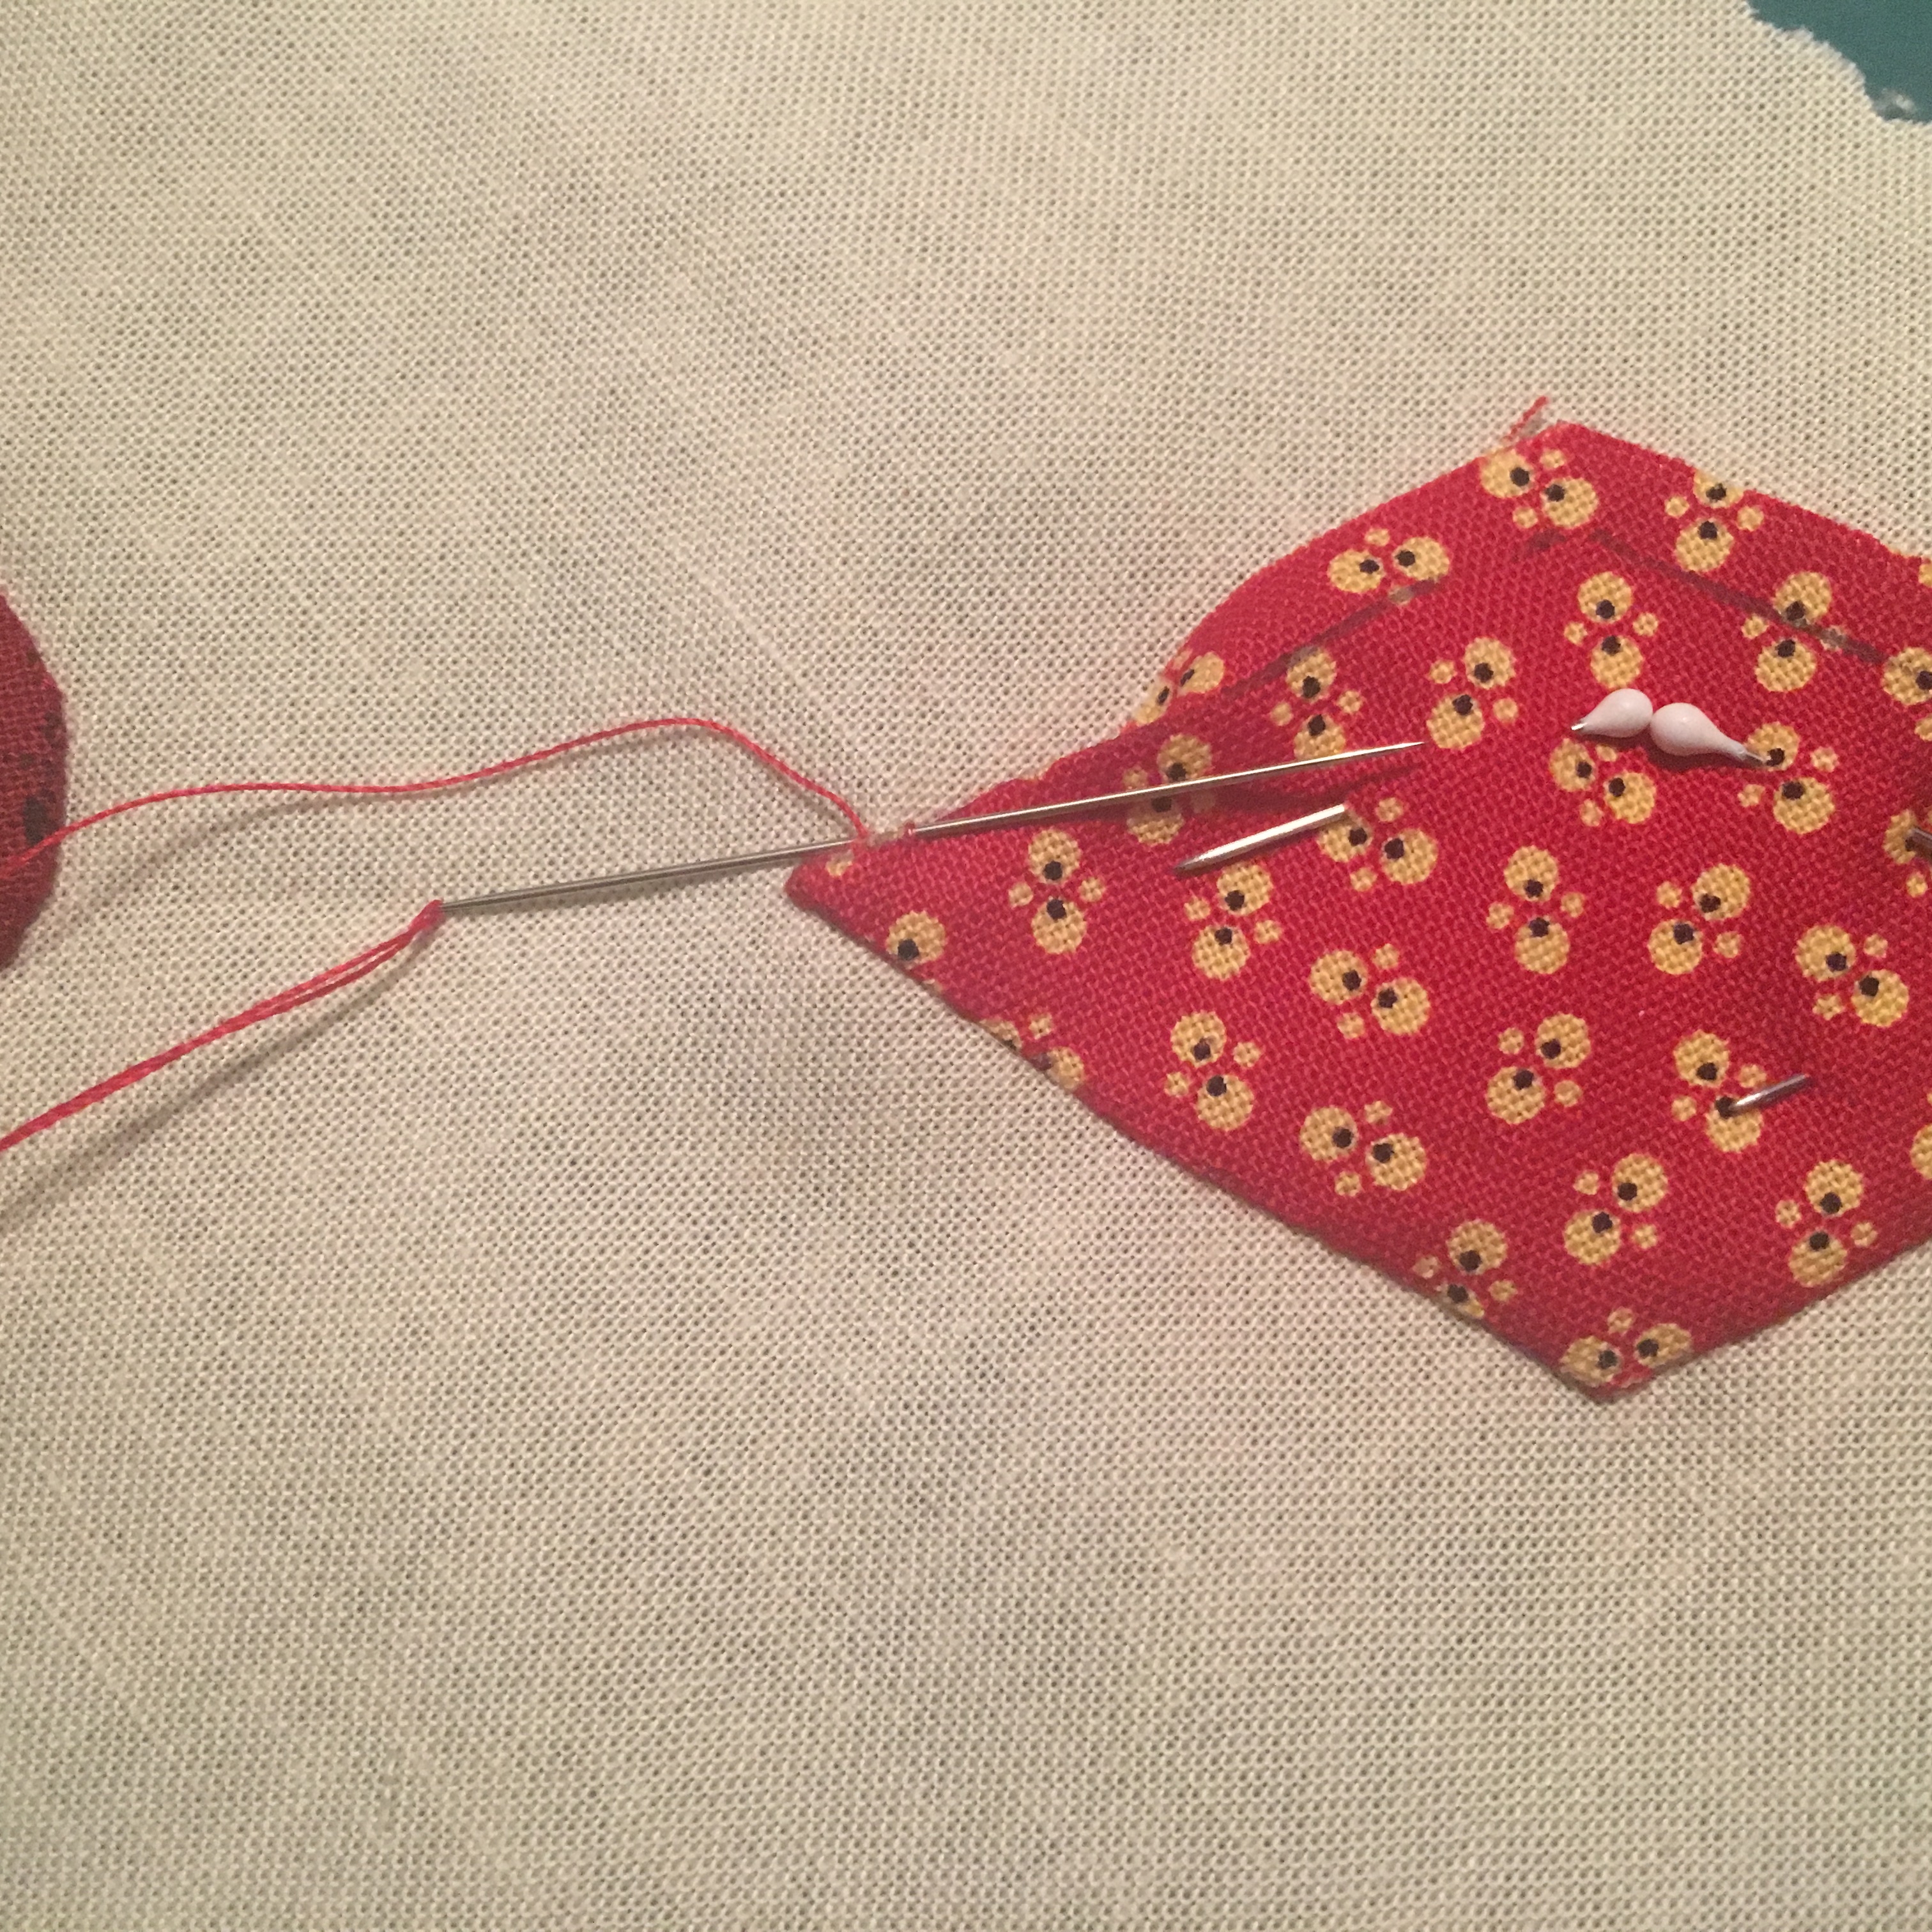
This block as made by Louisa A. You'd think this would have been a pieced block but the circle and each of the diamonds were appliqued on the background square. I love the tiny cross stitch letters Louisa stitched for her name. I believe Louisa's last name is Ackerman and she was living in New York when the block was made.

Block 10
When you have these blocks completed you'll be able to put the top left corner of the quilt together if you want to test the placement technique you're using for the corner diamonds or melons.
 The anniversary prize for March has been generously donated by Deborah from PlumEasy Patterns. If you received last week's newsletter you read about the wonderful ground walnut shells (unscented or lavender) to use as pincushion filling. I've added the ground emery to the online store and I'll come up with a pattern to make some tiny little strawberries to keep our needles and pins sharp. Leave a comment on this post telling me what you love most about the 1857 Album Quilt and I'll draw a name for the winner on the 20th of this month.
I feel like I'm forgetting something but it's nearly bed time and Violet will be here early in the morning so email me if something jumps out at you.
The 1857 Album Quilt - Block Set 3


Follow Me!